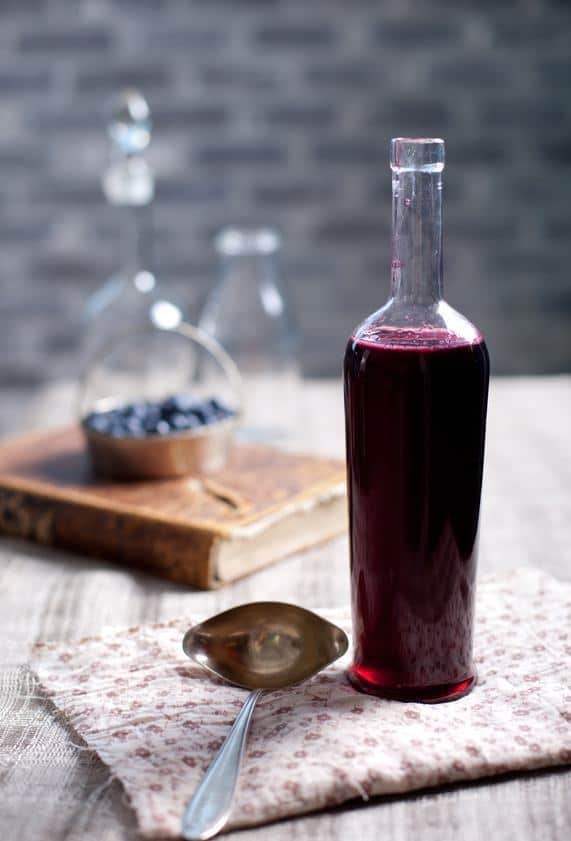
A Blueberry Wine Recipe You Don't Want to Miss
Fruit beers have seen a major resurgence in popularity over the past few years, and blueberry beer is arguably the most popular flavor.
Beloved by hipsters across the world, it is fruity but sharp, with a bubbly light blue color that makes grown men feel like little kids again.
Well prepare to impress your trendiest, beardiest friends – because blueberry wine is way, way better. The only downside is…it isn’t blue.
As far as fruit wines go, it’s still a little under the radar, but it’s easy to make and even easier to drink.
The tangy berries bring a fullness to the wine with fruity high notes and a really surprising depth of flavor.
And if you pick your blueberries fresh in the springtime, your wine will be ready to drink before the end of the summer – just enough time to fit in a few lazy picnics.
Fresh blueberries are always best, but this is one of those rare recipes which works just as well with frozen berries.
That’s because blueberries – like grapes – need minimal preparation before you begin the wine-making process. Just bash them up a bit and you’re good to go!
See? Easy. So why don’t you try it yourself, following this tried and tested DIY blueberry wine recipe below.
Equipment
Blueberry wine is one of my go-to ‘starter recipes’, that I recommend to people who have never made their own wine before.
The equipment listed here is the same basic equipment which you will need for any homemade wine, so you should only need to invest in these items once.
Yes, you are looking at an initial investment of around $40 in equipment, but I promise you that once you’ve tried your first batch of blueberry wine, you will be hooked on home wine-making, and ready to attempt another one of our great fruit and flower wine recipes.
When you think about it, $40 is really not that much to pay for your own at-home vineyard…
- A sterilized fermenting bin (sometimes called a brew bin), or a food grade basin with a capacity of at least one gallon.
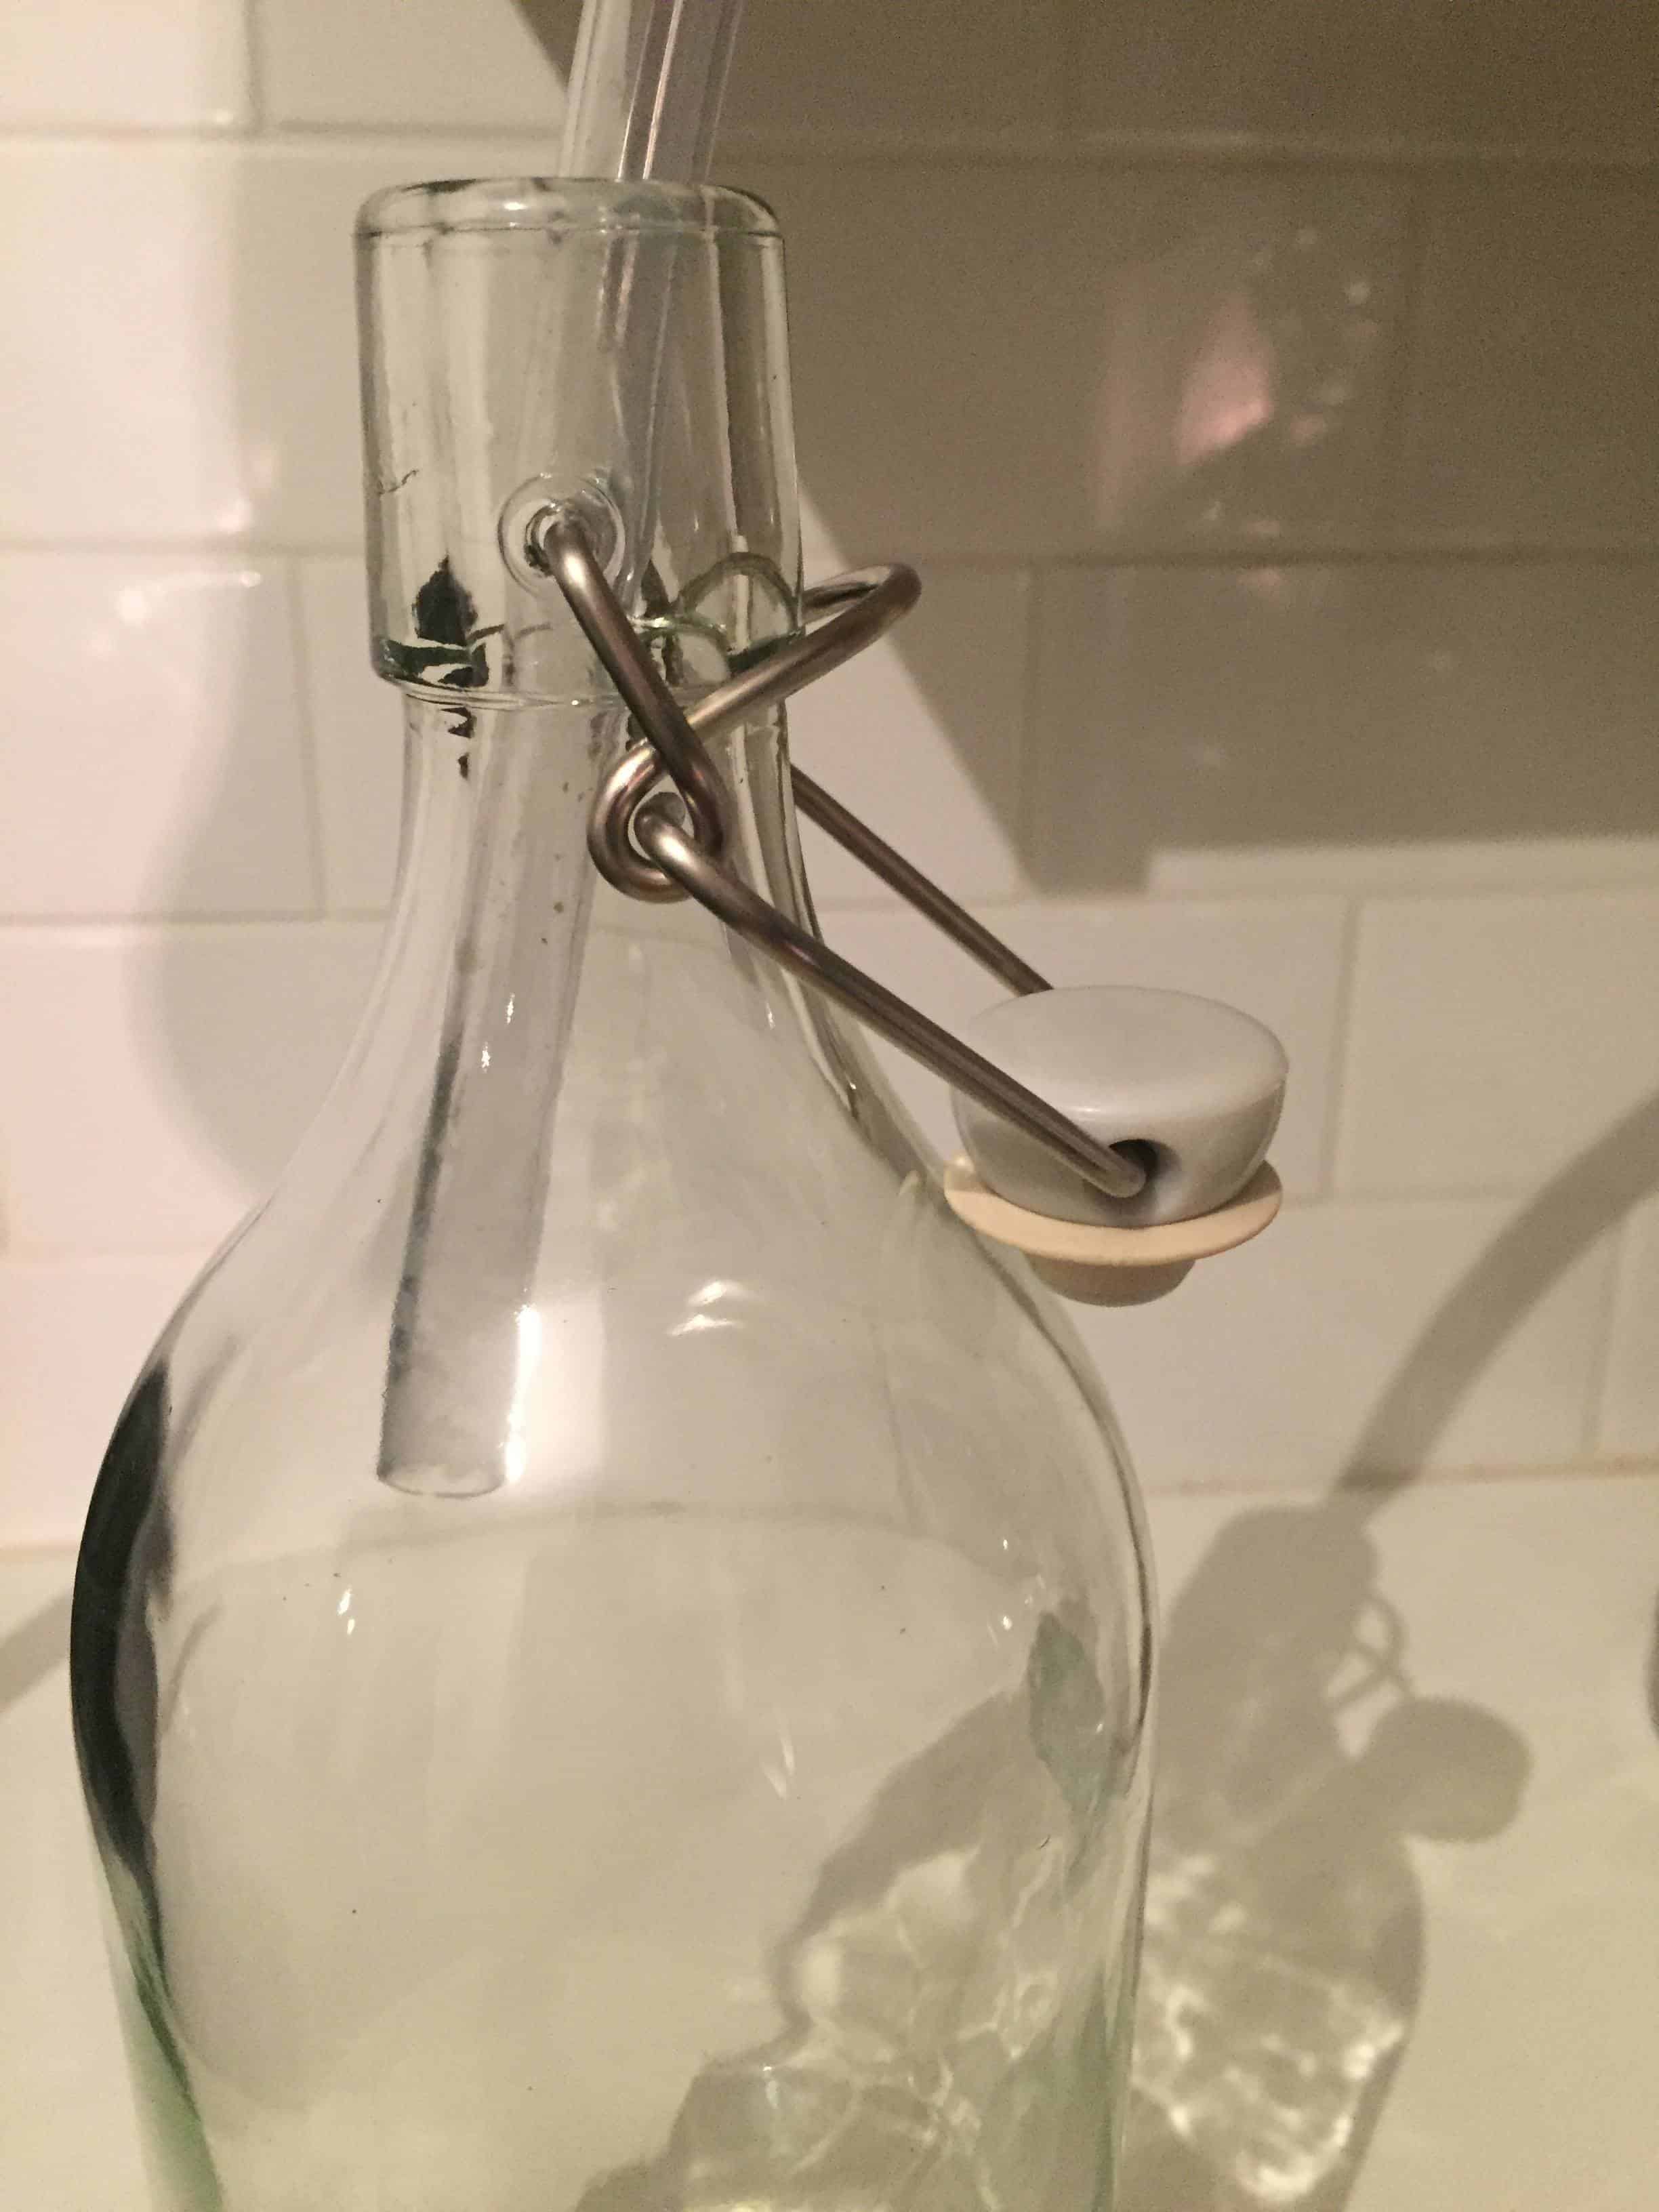
- 2 glass demijohns (at least one gallon in size), plus a fitted airlock and bung
- A large straining bag or muslin cloth
- A vinyl siphon tube (which is at least 3ft in length)
- 6 glass wine bottles, plus matching corks and a corker.
The great thing about these corkers is that you can also use them to re-seal half-drunk bottles of wine! Plus you’ll feel like a real wine-making pro while you’re using them.
- Hydrometer. This is not totally necessary, but it is a relatively cheap piece of kit which will help you keep an eye on your wine’s final ABV (Alcohol By Volume).
- A large funnel
NOTE: It is vital that you sterilize EVERY piece of wine-making equipment EVERY time you use it. Even the tiniest microbe can have a catastrophic effect on your wine’s fermentation process or flavor, and it’s just not worth taking that risk. You can read about the different sterilization methods elsewhere on our site, but I usually prefer to use campden tablets.
Ingredients
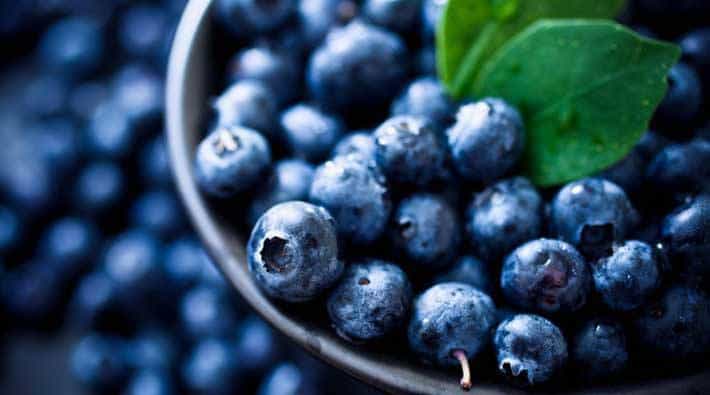
- 3-4lbs (1.3-1.8kg) fresh blueberries. Or the equivalent weight of frozen blueberries. If you’re using frozen, leave them to thaw slightly for around 30 minutes before using them.
- 2-2.5lbs (900g-1.13kg) granulated sugar, plus extra on standby for sweetening your wine later on in the process.
- Half a teaspoon of citric acid, or the juice of one organic lemon.
- Half a teaspoon of pectic enzyme. This is not strictly necessary, but it does help to break down any solids in the wine after fermentation. If you can’t get it, you won’t do any damage to the wine by leaving it out – you may just need to rack the wine one extra time (more on this below).
- Red wine yeast. Follow the instructions on the packet to find out how much you need to use and how it should be added – each brand will differ slightly on this.
- Yeast nutrient. Again, each brand is different so just follow the instructions on the pack.
- Wine stopper/stabilizer such as potassium sorbate
Our Blueberry Wine Recipe
STEP ONE – Finding your blueberries
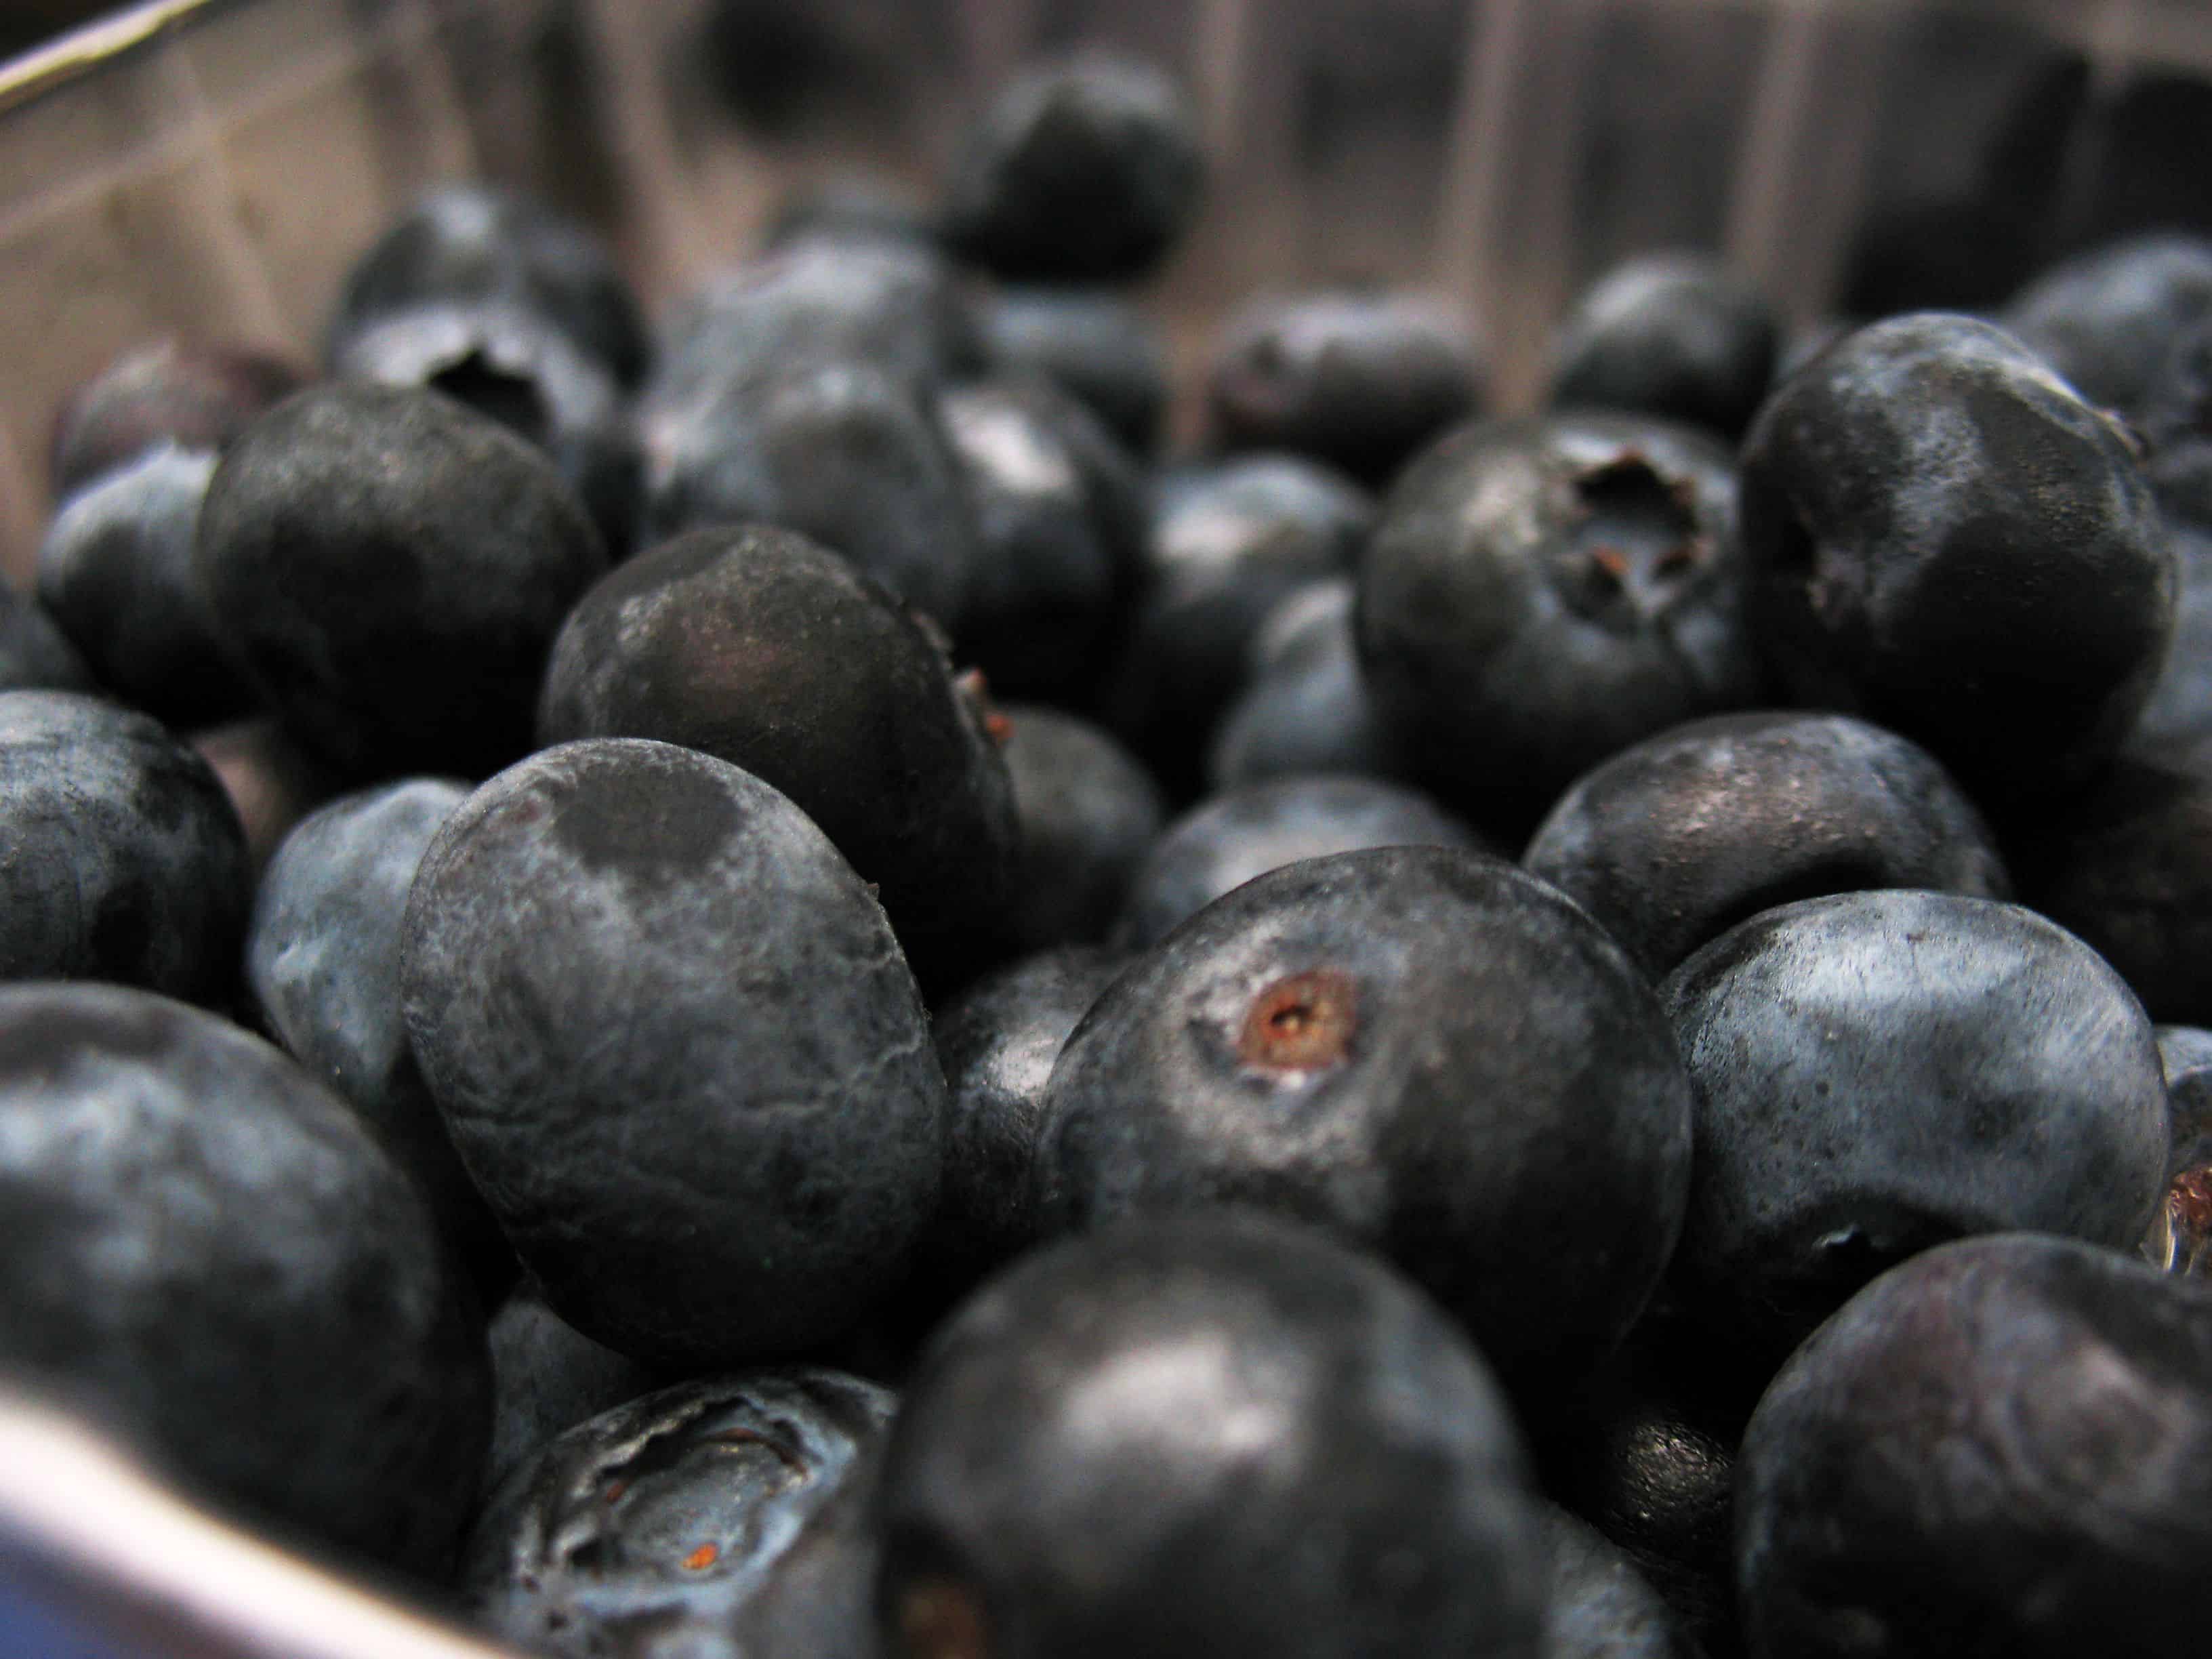
One of the best things about blueberry wine is that everyone knows what a blueberry looks like, and everyone knows where to get them.
Maybe you have a ripe and ready crop at the bottom of your garden, or maybe your local market sells them in bulk for a discounted price.
Blueberries are cheap, nutritious and readily available all across North America, so you should be able to pick some up at any time of the year.
If you are determined to pick your blueberries fresh off the branch, you will probably have to wait until May when the crops ripen. Blueberry season is relatively short, so don’t leave it any later than early August to pick your fill.
If you’re collecting your blueberries from a farm or ‘U-Pick’ area, check ahead and make sure that the berries have been grown organically.
Blueberries can grow quickly without much fertilizer, and they have no pests (except for the odd bird), so there should be no need to use pesticides or other chemicals on them.
Pesticides can potentially alter the flavor of your wine, and they can artificially plump up the berries, resulting in a bland taste and a dry texture that will disappoint.
When picking your berries, only take the ones which are plump and blue grey in color – avoid any which are mushy to the touch, are red or green in color, or have any tears in the skin.
A good way of telling if your berries are ripe is by taking a branch and simply rolling the berries between your finger and your palm. If they fall right off, they’re good to go.
STEP TWO – Preparing your blueberries
Once picked, your blueberries should stay fresh for a few days. However, if just one berry in your bucket is going moldy, the others risk contamination.
For that reason, you should do your best to minimize the time between collecting your berries and starting your wine.
Wash your blueberries well before using them, and take some time to go through your haul and pick out any tiny critters stowing away in your bucket, as well as any rogue leaves, sticks, and berries which are starting to go ‘off’, or are a little under-ripe.
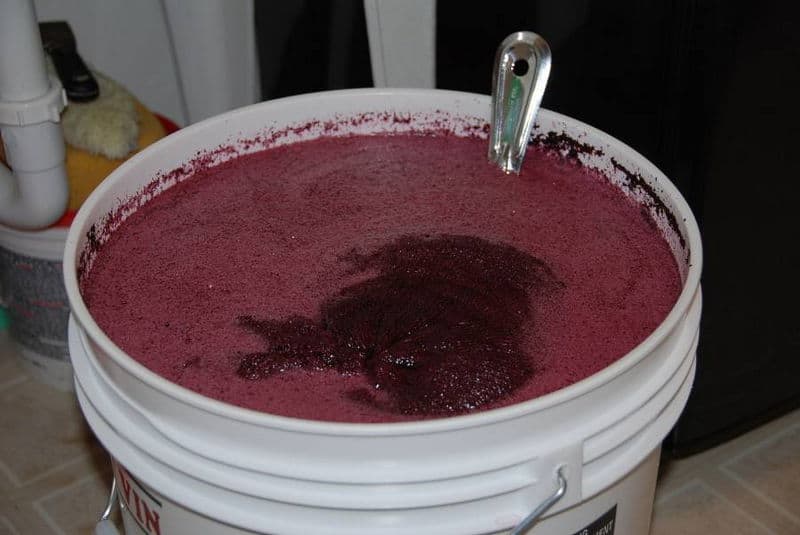
When you’re happy with your berries, transfer them into a big, clean pot and start mushing them up. You can use your hands for this part, but be warned – you will look like a member of the Blue Man Group by the time you’ve finished.
I just use a potato masher, and give them a good bash until most of the blueberries have split open, and the juices have started pouring out.
Some recipes suggest that you blitz your blueberries in a juicer or food processor at this stage – I can’t discourage this enough. Most juicers will rob you of the tannin-rich blueberry skin, leaving you with a weak, flavorless wine in the end.
And if you blitz your berries, you are potentially crushing up the tiny seeds inside, which can lend a bitter taste to your wine which no amount of sugar can conceal.
Mashing by hand is fun, easy and quick, and will give you the colorful blueberry mush that you need.
STEP THREE – Fermentation time!
Now it’s time to really get things going!
First, add your sugar to the blueberry mush and stir until it has completely dissolved (the sugar that is, not the blueberries).
Pour the mix into your sterilized fermenting bin, and add approximately one gallon of filtered or bottled water, then stir in the citric acid (or lemon juice), the pectic enzyme (if using), and the yeast nutrient.
Cover the fermenting bin and leave it to sit at room temperature for 24-48 hours, stirring it twice a day.
If you are using a hydrometer, this is when you whip it out! You are looking for a gravity reading of 1.090. Keep adding sugar until you get to this figure.
If you don’t have a hydrometer, don’t worry – you can always add in sugar later on if the wine feels a little bitter. You’ll know it’s time to move on to the next step when your blueberry mush has turned into a blue/purple liquid with little berry lumps floating on the surface. Twenty-four hours should do the trick.
STEP FOUR – Bubble frenzy
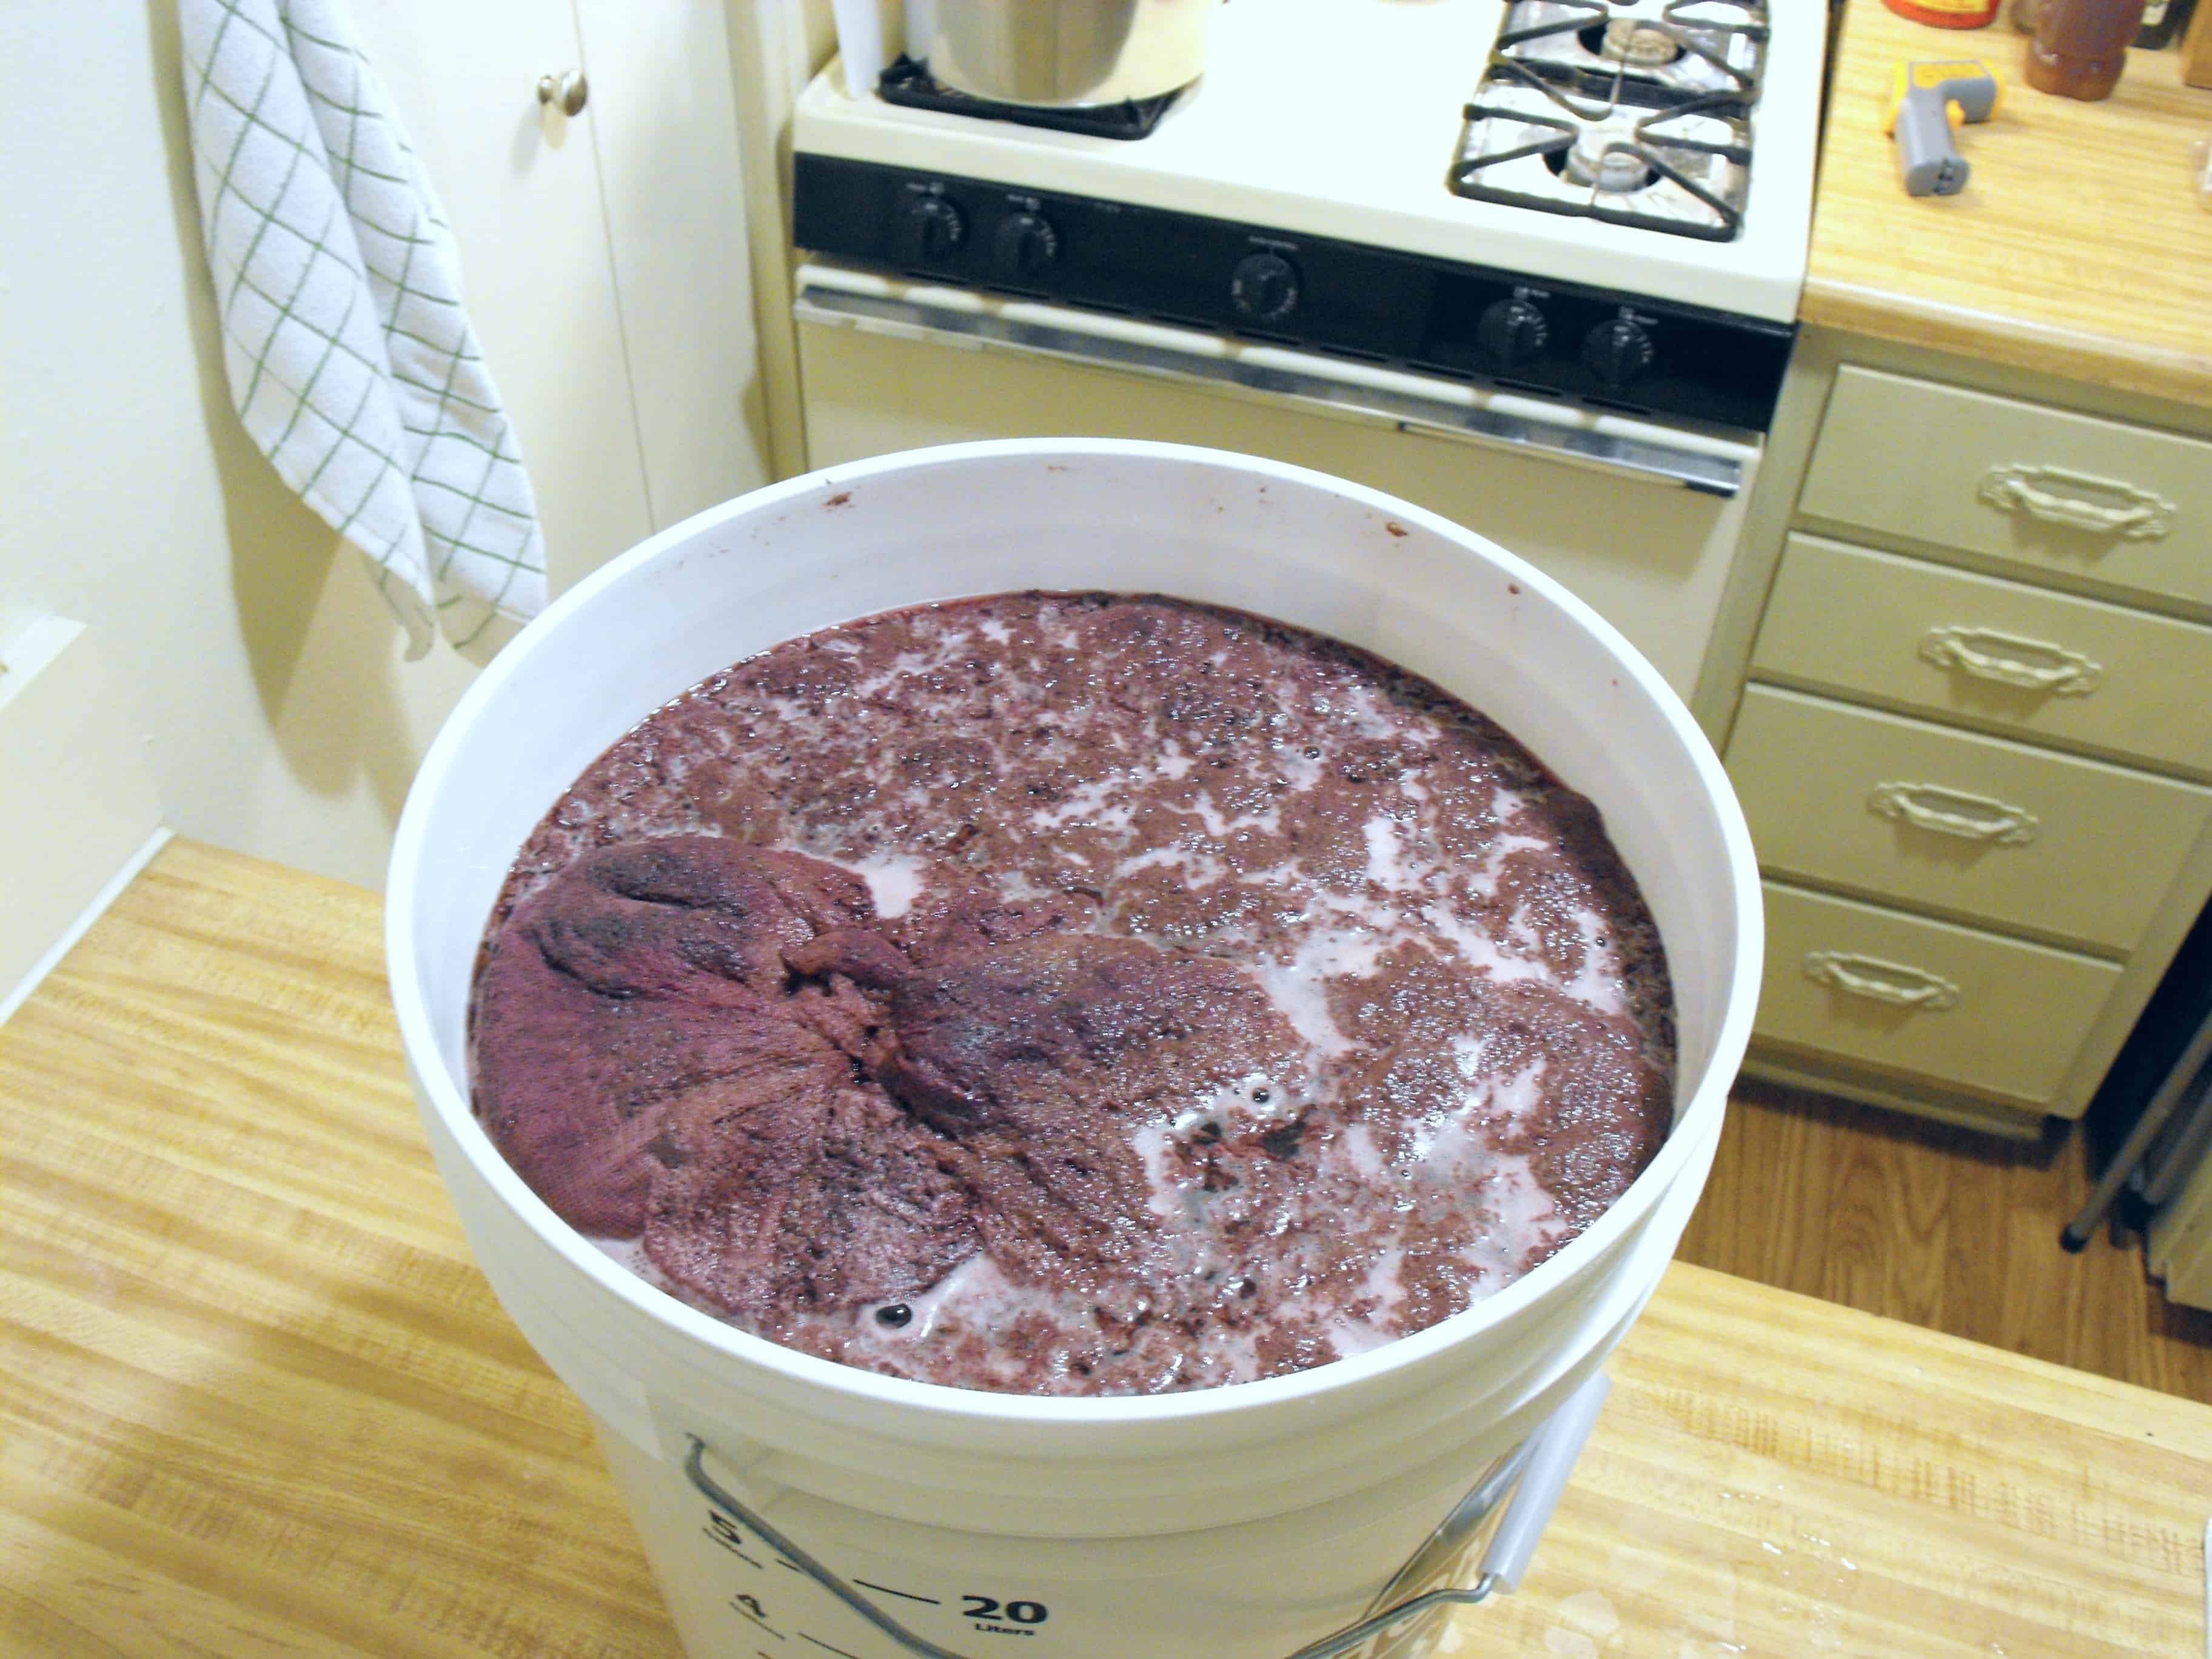
Now add your yeast, and cover the fermentation bin again. Leave your wine mix for 5-7 days now while the fermentation takes hold, but make sure you check on it every day so you can keep an eye on your progress and give it a bit of a stir (with a sterilized spoon of course).
After around 48 hours, you should notice a sudden rush of bubbles to the surface of the bin, and your wine might start to swirl menacingly, like a miniature blue whirlpool.
Around 48 hours later, you will find that the bubbling has calmed down a bit, but there is a thin layer of foam appearing on the top of your bin. Just give it another stir, and go about your day.
After another 48 hours, the bubbling should have stopped altogether – that’s when you know it’s time to end the fermentation.
Skim off any scum which remains along the edges of the fermentation bin, and give your mixture one final stir. Then sterilize your demijohn, airlock, bung and funnel – because the next step is all about straining the mixture.
STEP FIVE – Feeling the strain!
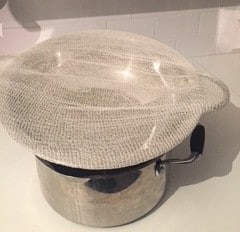
Take all your sterilized equipment and set it up on a clean work surface, with lots of towels on standby to clean up any spillages.
First you need to strain your blueberry liquid through your mesh straining bag or muslin cloth, until all the blueberry residue has been removed.
You may need two people for this – one to hold the straining bag in place, and one to pour the liquid over the top. If you manage not to spill anything at this point, you are my hero.
Make sure you give the straining bag a good squeeze at the end, to release all the rich juices of the blueberries before you throw them away.
If there is still quite a bit of sediment left in your wine, strain it again.
Once you’re happy with the color and clarity of your wine, you can start moving it into your demijohn.
Using a (sterilized) funnel, pour the liquid into your demijohn, being careful not to spill anything. If it doesn’t quite fill the bottle, you can just top it up with a mixture of filtered water and sugar (three parts water to one part sugar).
Now all you have to do is attach the bung and airlock, and leave it in a cool, dark place for a month.
STEP SIX – Racking your wine
For the first couple of weeks after you’ve transferred your wine into the demijohn, you will notice a steady stream of bubbles rising up from the bottom of the bottle – much like champagne.
After a few weeks of this, the fizzing will stop and that’s when you know it’s time to start racking your wine.
“Racking” is just the word wine-fans use for moving wine from one demijohn to another, leaving any sediment behind. It will give you a clearer, more professional looking liquid, but more importantly, it gives you your first opportunity to taste the wine.
To rack your wine, you need to carefully place your demijohn on a tabletop or other flat, raised surface. Then dig out your second demijohn, sterilize it, and place it on the ground below.
Remove the bung from the filled demijohn, and lower your siphon tube towards the bottom of the bottle, stopping around half an inch from the glass bottom where the sediment is sitting.
Then take the other end of the tube, and suck! This is a long tube, so you might have to try a few times, but once you taste wine, you know you’re doing something right. Quickly pop the tube into the second demijohn (the empty one on the floor) and watch it fill up with purply-red blueberry wine.
Be careful not to allow any sediment to escape up the tube during this process- the whole point of racking is to get rid of all those last tiny bits at the bottom of the bottle, so if you accidentally end up transferring them into the new demijohn, you’ll have to rack again.
When you’re done racking, top up the liquid as before (with filtered water and sugar), put the airlock and bung back onto the newly-filled demijohn, and put it back into storage for another month.
Then repeat this whole process all over again.
STEP SEVEN – The final countdown
During the racking process, you will have had your first taste of your very own home-made blueberry wine. So what was it like?
- Bitter and/or dry?
Just add more sugar to the mix.
- Overly sweet?
Leave it to mature for six months or more before you start bottling it up.
You can use your hydrometer to check the ABV of the wine at this point. Once you’ve reached a level that you’re happy with (usually 10-13%), you can stop any further fermentation by adding a wine stabilizer or a crumbled up campden tablet (use one tablet for each gallon of wine).
If you aren’t using a hydrometer, you can judge the wine on its taste. Take a little sip every week to monitor the changing flavors. Once you taste something you like, you can start bottling up!
STEP EIGHT – Bottling your wine
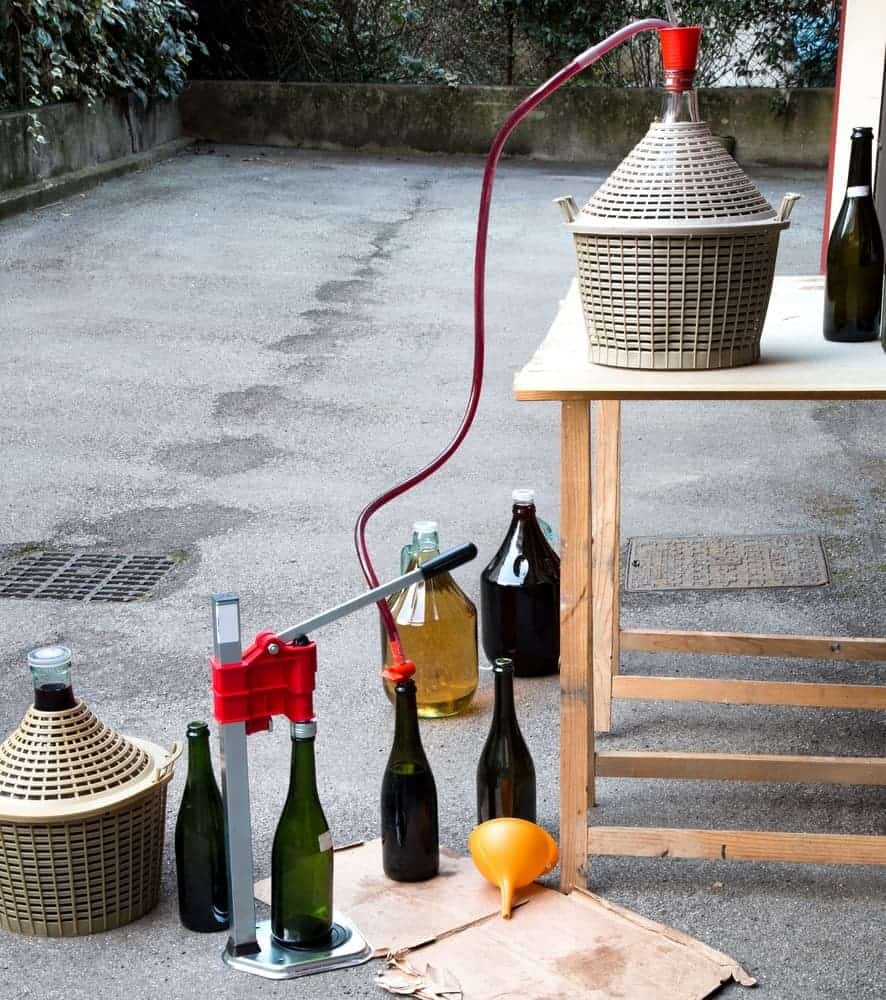
Bottling your wine is pretty similar to racking your wine. Put your demijohn on the table and line up your wine bottles on the ground below. Use you siphon tube to fill each bottle, then simply cork and seal and voila! You’ve made your very own blueberry wine!
Try not to get stuck into your wine stash right away – blueberry wine really benefits from three months in storage. The longer you leave it, the drier it will become, so if you find that your first batch is a little sweet, just wait an extra month or two before cracking open your first bottle.
While you’re waiting for your wine to be ready, why not make up a few personalized labels for your bottles, with a picture of your ‘vineyard’, the bottling date, and a list of ingredients. It will make your home-made wine look so much more impressive when your guests come over.
Oh, and if you really want that blue color that you get with the beers? Just add a drop of blue food coloring to each bottle before you cork them. That’s what the beer companies do anyway.
Now that you’ve successfully made your own fruit wine, all that’s left to do is enjoy it! Blueberry wine has a lovely depth of flavor which pairs beautifully with pork, venison and poultry, while the fruity sweetness means it can easily pass for a dessert wine, particularly when served with marzipan and citrus.
But for me, the best way to enjoy a glass of homemade blueberry wine is in the great outdoors, on a picnic blanket, along with a punnet of late-season blueberries fresh from the bush. You can’t help but be reminded of the journey you took from berry-picking to wine-drinking, and it will make all of the effort, the spills and the torturous waiting feel completely worthwhile.
Let us know how you like to serve your blueberry wine, and where you will be drinking it this year!
Recommended: Curious how to make plum wine?
Conclusion
I believe that everyone should try to make blueberry wine at least once in their lifetimes.
It is such a fun, easy and delicious wine to make, and you don’t need a degree in vitiology to produce a few great bottles.
With just a few basic pieces of equipment and a few ingredients, you can teach yourself the ancient art of wine-making, and gain a new appreciation for the humble blueberry.
Now that you’ve mastered blueberry wine, why not start experimenting with a few alternative flavors and ingredients?
To share your wine-making experiences, just use the comment box below.
And if you enjoyed this article (and the wine that it helped produce), feel free to share it with friends, family and drinking buddies.
I made Blueberry Wine, it fermented all the sugar and barley tasted like blueberries. I used frozen locally sourced blueberries. But, if you add sugar and not kill the yeast it will continue to ferment. how do you kill the yeast so you can sweeten
Hi, there are a few different ways you can do this. You can learn about them here:
https://wineturtle.com/how-to-stop-fermentation-in-winemaking/